OpenStack 的部署链路比较长,组件之间的依赖也多。这篇记录按实际搭建顺序展开,从虚拟机环境准备开始,依次配置基础服务、Keystone、Glance、Placement、Nova、Neutron、Dashboard、Cinder,并完成实例创建和冷迁移验证。
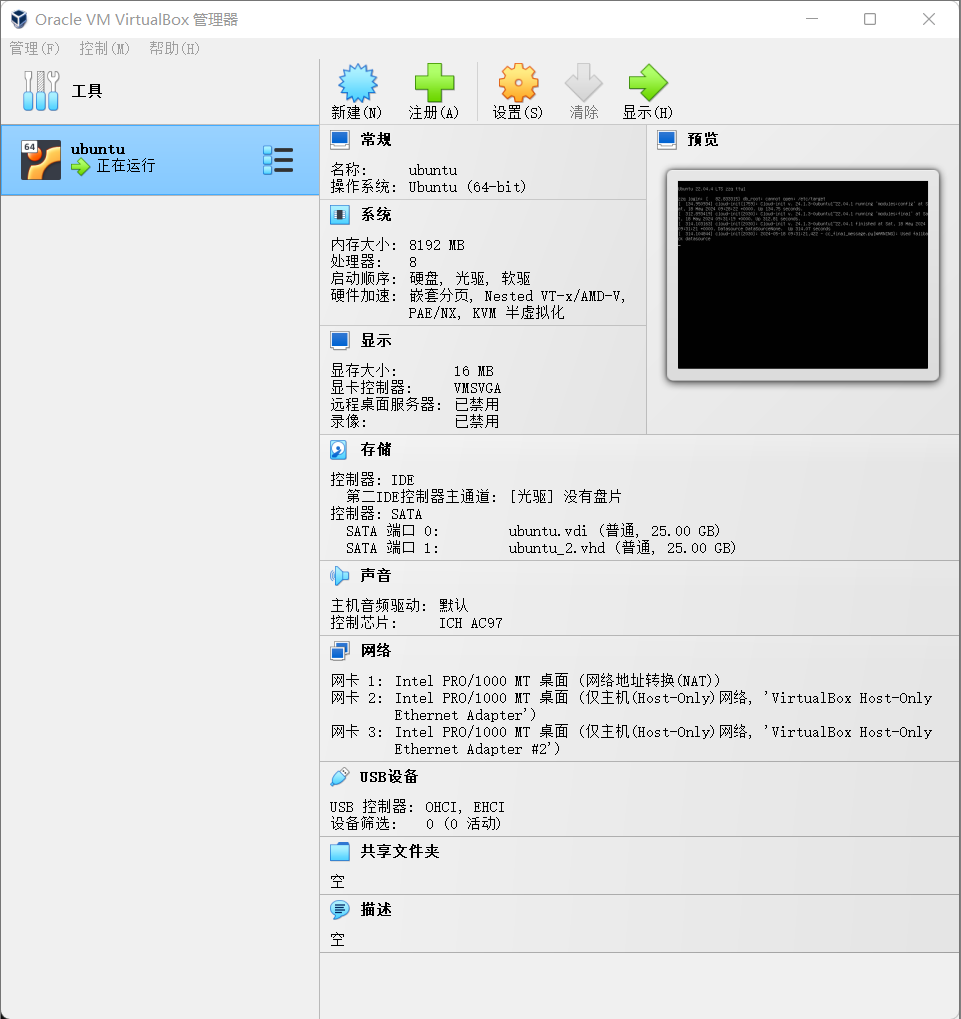
使用 VirtualBox 创建一个 Ubuntu 22.04 虚拟机,OpenStack 的所有组件都部署在这台虚拟机中,详细规格如下:
一个NAT网卡,两个host-only网卡,地址为:192.168.56.103以及192.168.212.4。内存分配8G,8个处理器。其他保持默认。
基础配置沿用之前整理过的一套 Linux 初始化流程,这里只保留和后续 OpenStack 部署相关的关键操作。
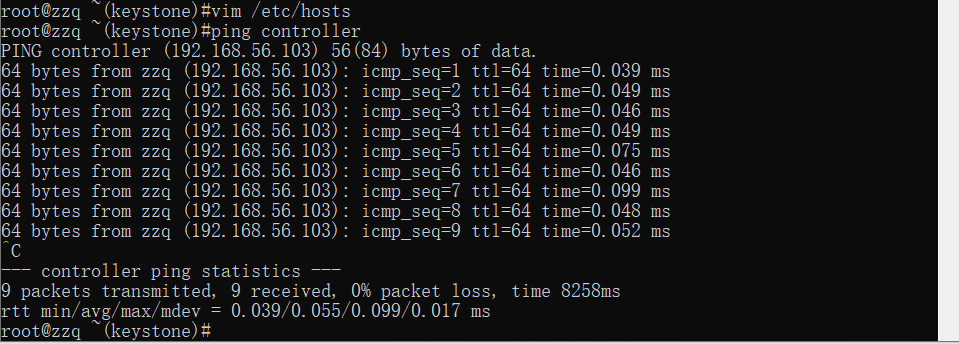
配置主机名方便后续的环境配置
1
2
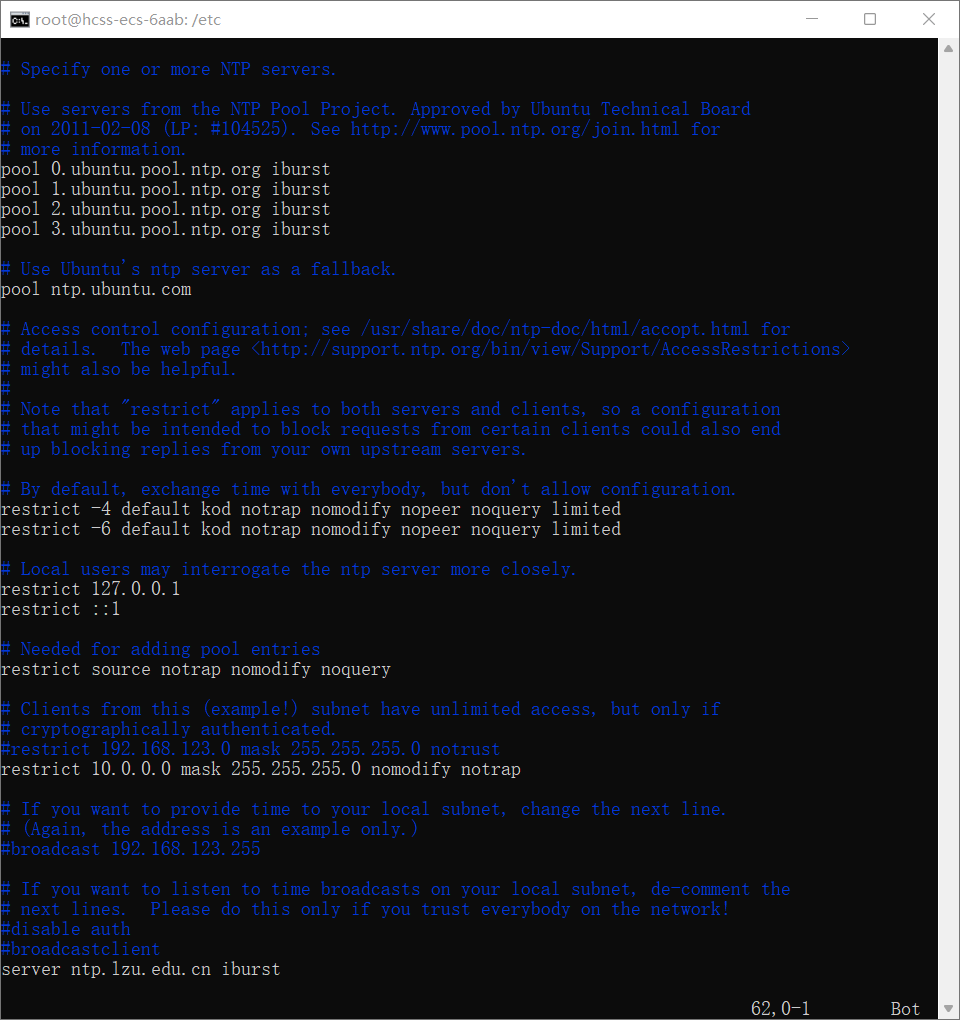
# timedatectl set-timezone Asia/Shanghai # apt-get install ntp
1
2
3
4
# ssh-keygen -t rsa -P '' -f ~/.ssh/id_rsa # cat ~/.ssh/id_rsa.pub >> ~/.ssh/authorized_keys # chmod 0600 ~/.ssh/authorized_keys # vim /etc/ssh/sshd_config
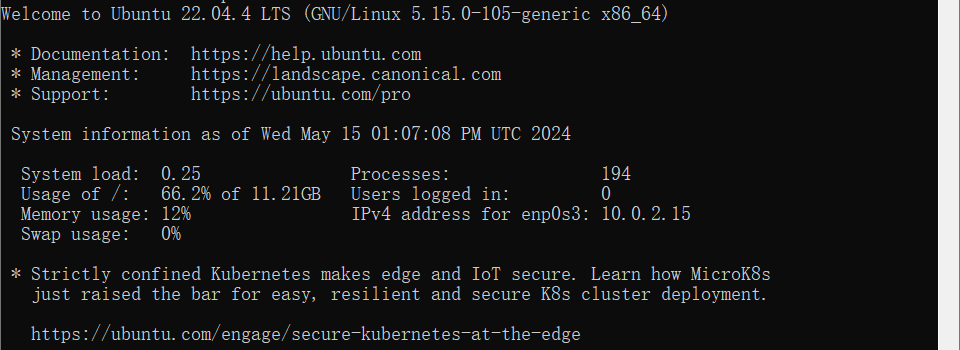
配置完毕后可以正常SSH登陆虚拟机
更新系统
1 apt update && apt upgrade -y
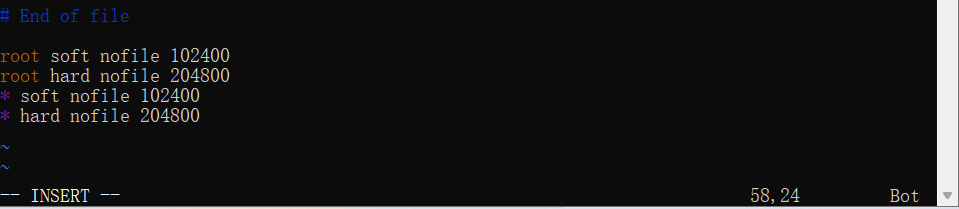
优化file-max nropen和ulimit
1
2
# vi /etc/security/limits.conf # vi /etc/sysctl.conf
安装
1
2
3
4
5
6
7
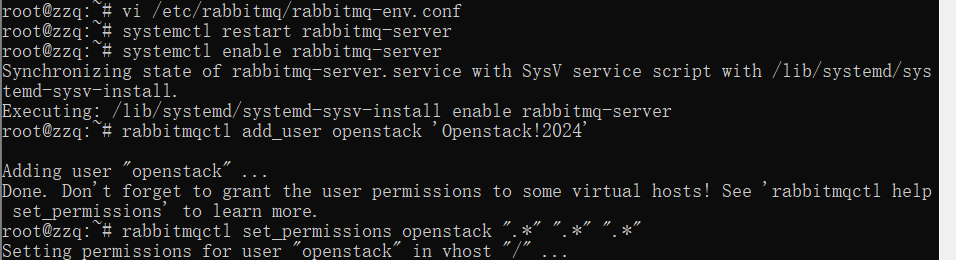
# apt -y install rabbitmq-server # vi /etc/rabbitmq/rabbitmq-env.conf NODENAME=rabbit@localhost NODE_IP_ADDRESS=0.0.0.0 NODE_PORT=5672 # systemctl restart rabbitmq-server # systemctl enable rabbitmq-server
添加用户并配置权限
1
2
# rabbitmqctl add_user openstack 'Openstack!2024' # rabbitmqctl set_permissions openstack ".*" ".*" ".*"
安装
1
2
3
4
5
# apt -y install memcached python3-memcache # vi /etc/memcached.conf -l 0.0.0.0 # systemctl restart memcached # systemctl enable memcached
安装
1
2
3
4
5
6
7
8
9
10
11
12
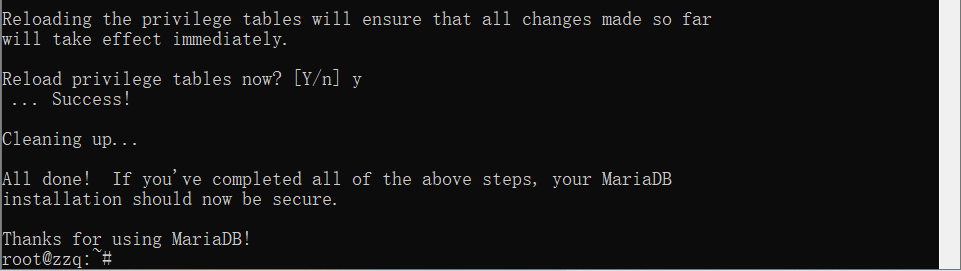
# apt -y install mariadb-server python3-pymysql # vi /etc/mysql/mariadb.conf.d/50-server.cnf [mysqld] bind-address = 0.0.0.0 default-storage-engine = innodb max_connections = 4096 innodb_file_per_table = on collation-server = utf8_general_ci character-set-server = utf8 # systemctl restart mariadb # systemctl enable mariadb # mysql_secure_installation
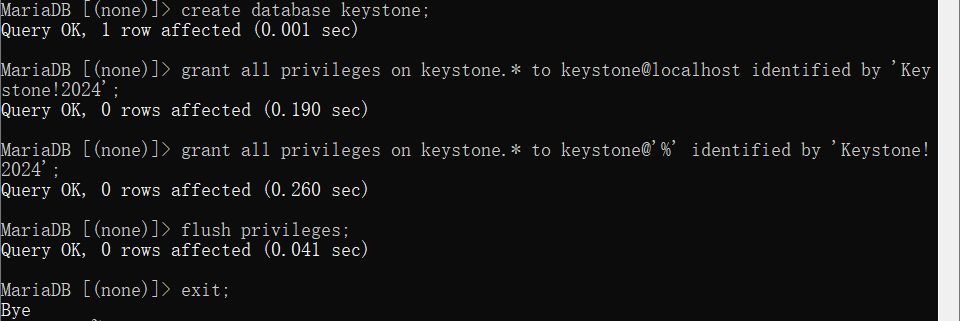
创建keystone database
1
2
3
4
5
6
# mysql -u root -p > create database keystone; > grant all privileges on keystone.* to keystone@localhost identified by 'Keystone!2024'; > grant all privileges on keystone.* to keystone@'%' identified by 'Keystone!2024'; > flush privileges; > exit
1
2
3
4
5
6
7
8
9
10
11
12
13
14
# apt -y install keystone python3-openstackclient apache2 libapache2-mod-wsgi-py3 python3-oauth2client # mv /etc/keystone/keystone.conf /etc/keystone/keystone.conf.org # grep -vE "^$|^#" /etc/keystone/keystone.conf.org # vi /etc/keystone/keystone.conf [DEFAULT] log_dir = /var/log/keystone [cache] memcache_servers = 192.168.56.103:11211 [database] connection = mysql+pymysql://keystone:Keystone!2024@192.168.56.103/keystone [token] provider = fernet # chmod 640 /etc/keystone/keystone.conf # chown keystone.keystone /etc/keystone/keystone.conf
# su -s /bin/sh -c “keystone-manage db_sync” keystone
1
2
3
4
5
6
7
8
9
10
11
12
13
14
15
16
# keystone-manage fernet_setup --keystone-user keystone --keystone-group keystone # keystone-manage credential_setup --keystone-user keystone --keystone-group keystone # controller=192.168.56.103 # keystone-manage bootstrap --bootstrap-password 'Keystone!2024' \ --bootstrap-admin-url http://$controller:5000/v3/ \ --bootstrap-internal-url http://$controller:5000/v3/ \ --bootstrap-public-url http://$controller:5000/v3/ \ --bootstrap-region-id RegionOne # vi /etc/apache2/apache2.conf ServerName controller # vi /etc/apache2/conf-enabled/security.conf ServerTokens Prod # systemctl restart apache2 # cat /etc/apache2/sites-enabled/keystone.conf # netstat -an | grep 5000 # lsof | grep 5000
1
2
3
4
5
6
7
8
9
10
11
12
13
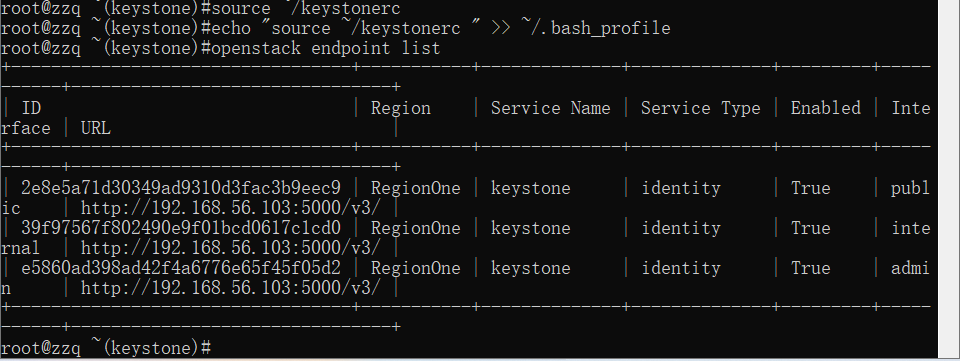
# vi ~/keystonerc export OS_PROJECT_DOMAIN_NAME=default export OS_USER_DOMAIN_NAME=default export OS_PROJECT_NAME=admin export OS_USERNAME=admin export OS_PASSWORD=Keystone!2024 export OS_AUTH_URL=http://192.168.56.103:5000/v3 export OS_IDENTITY_API_VERSION=3 export OS_IMAGE_API_VERSION=2 export PS1='\u@\h \W(keystone)\$' # chmod 600 ~/keystonerc # source ~/keystonerc # echo "source ~/keystonerc " >> ~/.bash_profile
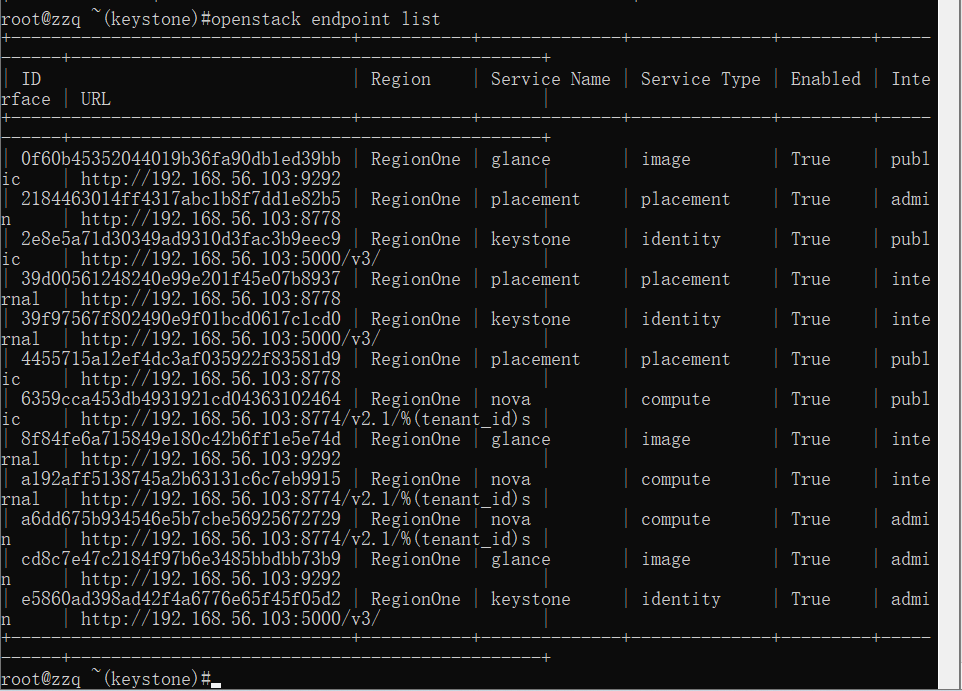
验证服务
1 # openstack endpoint list
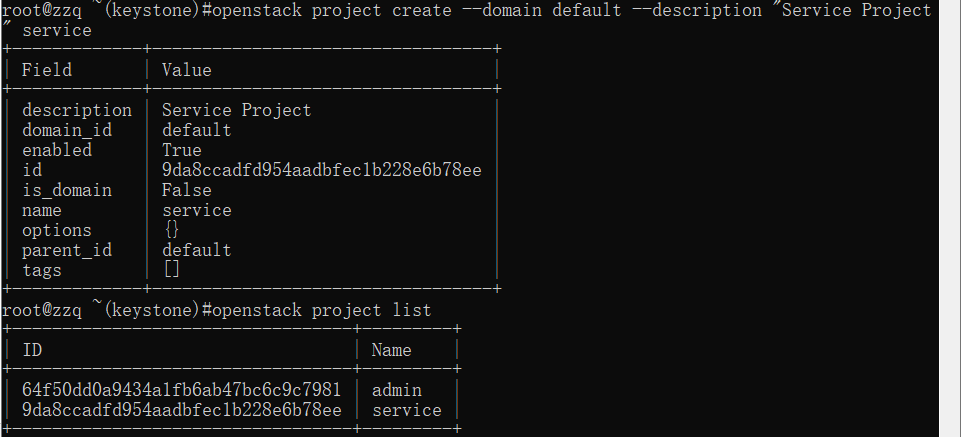
create service project for the openstack
1
2
# openstack project create --domain default --description "Service Project" service # openstack project list
验证完毕。
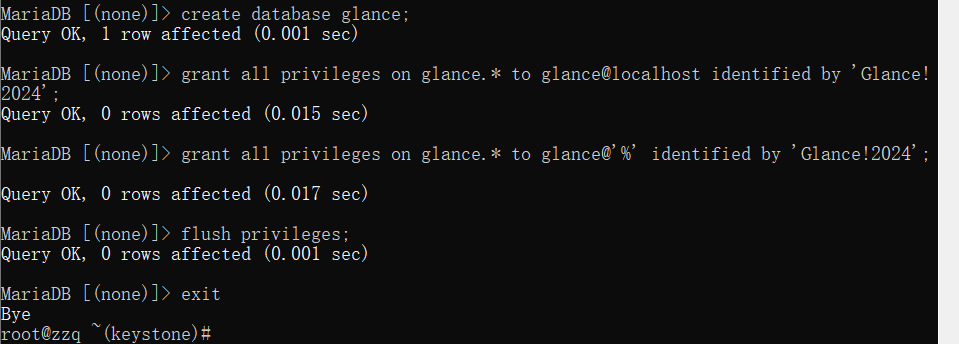
创建glance database
1
2
3
4
5
6
# mysql -u root -p > create database glance; > grant all privileges on glance.* to glance@localhost identified by 'Glance!2024'; > grant all privileges on glance.* to glance@'%' identified by 'Glance!2024'; > flush privileges; > exit
1
2
3
4
5
6
7
8
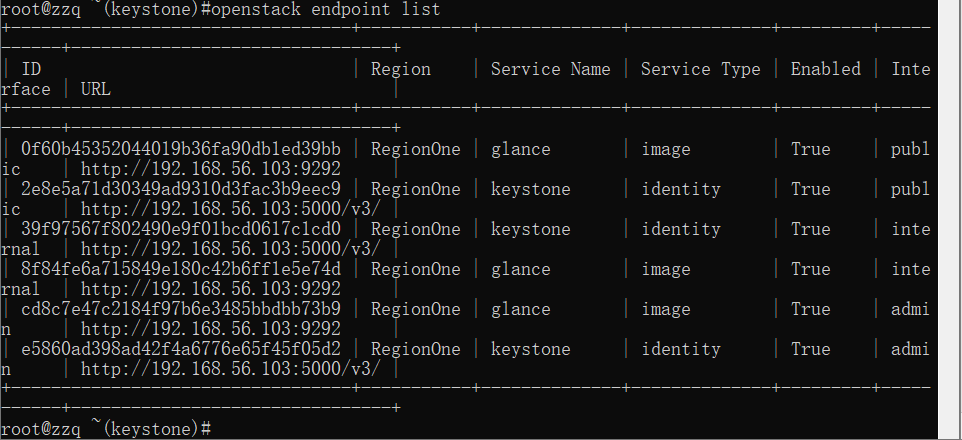
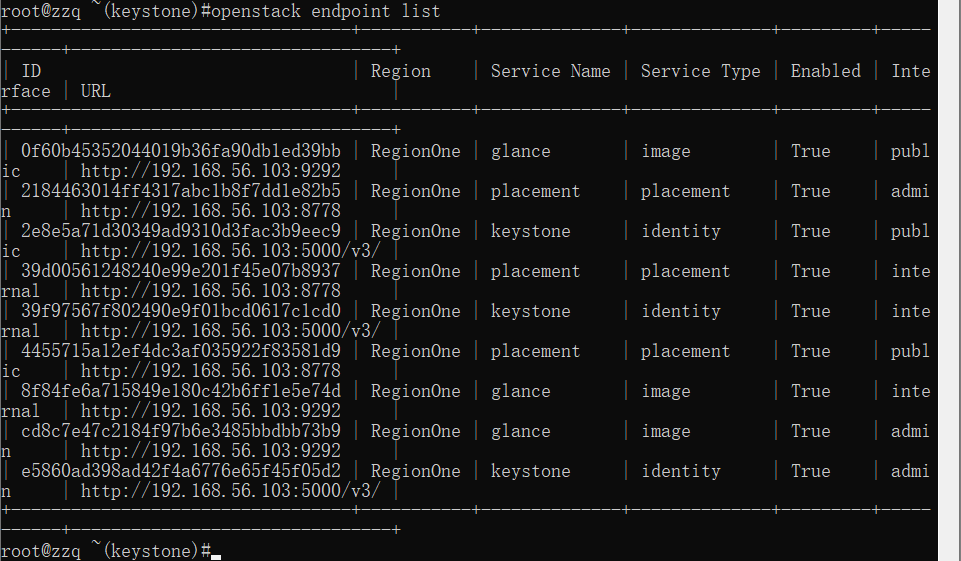
# openstack user create --domain default --project service --password 'Glance!2024' glance # openstack role add --project service --user glance admin # openstack service create --name glance --description "OpenStack Image" image # glance=192.168.56.103 # openstack endpoint create --region RegionOne image public http://$glance:9292 # openstack endpoint create --region RegionOne image internal http://$glance:9292 # openstack endpoint create --region RegionOne image admin http://$glance:9292 # openstack endpoint list
安装glance
1
2
3
4
5
6
7
8
9
10
11
12
13
14
15
16
17
18
19
20
21
22
23
24
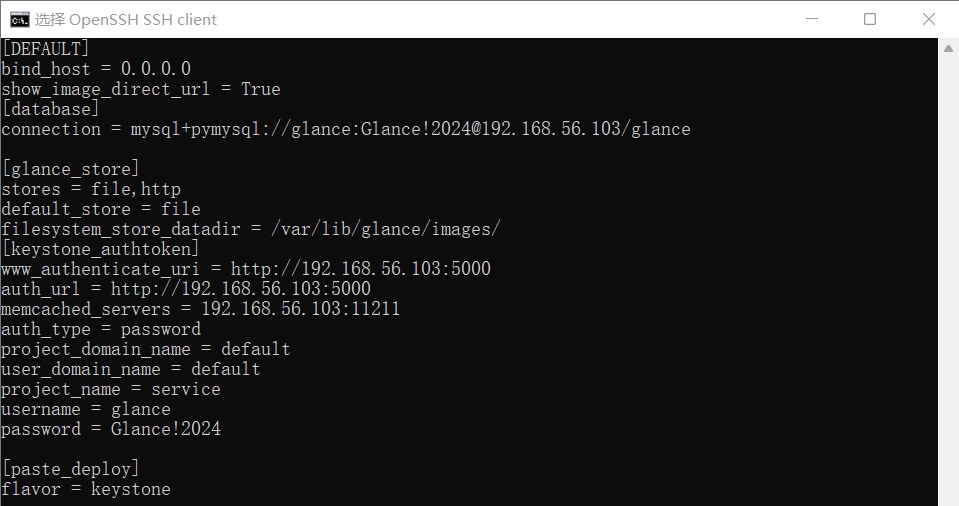
# apt install glance -y # mv /etc/glance/glance-api.conf /etc/glance/glance-api.conf.org # vi /etc/glance/glance-api.conf [DEFAULT] bind_host = 0.0.0.0 show_image_direct_url = True [database] connection = mysql+pymysql://glance:Glance!2024@192.168.56.103/glance [glance_store] stores = file,http default_store = file filesystem_store_datadir = /var/lib/glance/images/ [keystone_authtoken] www_authenticate_uri = http://192.168.56.103:5000 auth_url = http://192.168.56.103:5000 memcached_servers = 192.168.56.103:11211 auth_type = password project_domain_name = default user_domain_name = default project_name = service username = glance password = Glance!2024 [paste_deploy] flavor = keystone
1
2
# chmod 640 /etc/glance/glance-api.conf # chown root:glance /etc/glance/glance-api.conf
添加数据
1
2
3
4
# su -s /bin/sh -c "glance-manage db_sync" glance Start the service # systemctl restart glance-api # systemctl enable glance-api
验证glance服务
1
2
3
4
5
6
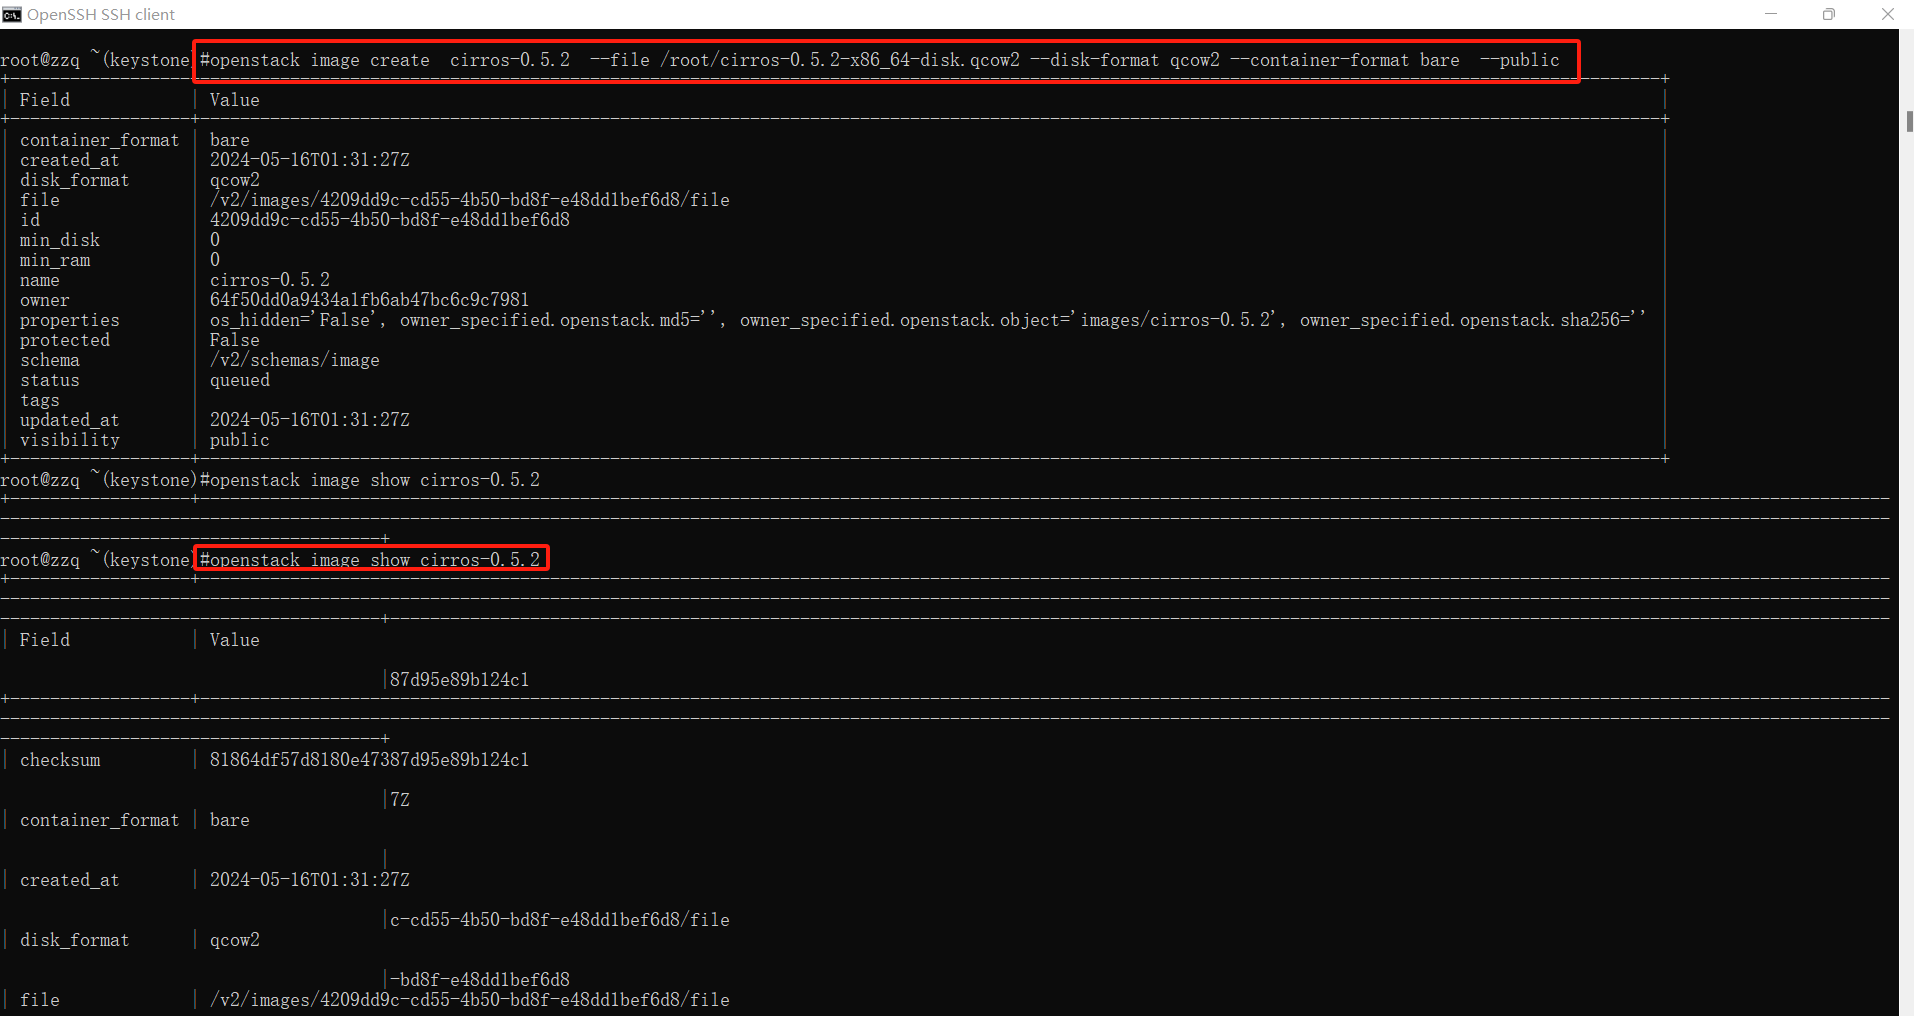
# wget http://bigdata.cg.lzu.edu.cn/cirros-0.5.2-x86_64-disk.img # qemu-img info cirros-0.5.2-x86_64-disk.img # qemu-img convert -f qcow2 -O qcow2 cirros-0.5.2-x86_64-disk.img cirros-0.5.2-x86_64-disk.qcow2 # qemu-img convert -f qcow2 -O raw cirros-0.5.2-x86_64-disk.img cirros-0.5.2-x86_64-disk.raw # openstack image create cirros-0.5.2 --file /root/cirros-0.5.2-x86_64-disk.qcow2 --disk-format qcow2 --container-format bare --public # openstack image list
#openstack image show cirros-0.5.2
验证完毕。
创建glancement database
1
2
3
4
5
6
7
8
9
10
11
12
13
14
15
# mysql -u root -p > create database placement; > grant all privileges on placement.* to placement@localhost identified by 'Placement!2024'; > grant all privileges on placement.* to placement@'%' identified by 'Placement!2024'; > flush privileges; > exit create placement user in service project # openstack user create --domain default --project service --password 'Placement!2024' placement # openstack role add --project service --user placement admin # openstack service create --name placement --description "Placement API" placement # controller=192.168.56.103 # openstack endpoint create --region RegionOne placement public http://$controller:8778 # openstack endpoint create --region RegionOne placement internal http://$controller:8778 # openstack endpoint create --region RegionOne placement admin http://$controller:8778 # openstack endpoint list
1
2
3
4
5
6
7
8
9
10
11
12
13
14
15
16
17
18
19
20
21
# apt install -y placement-api # mv /etc/placement/placement.conf /etc/placement/placement.conf.org # vi /etc/placement/placement.conf [DEFAULT] debug = false [placement_database] connection = mysql+pymysql://placement:Placement!2024@192.168.56.103/placement [api] auth_strategy = keystone [keystone_authtoken] www_authenticate_uri = http://192.168.56.103:5000 auth_url = http://192.168.56.103:5000 memcached_servers = 192.168.56.103:11211 auth_type = password project_domain_name = default user_domain_name = default project_name = service username = placement password = Placement!2024 # chmod 640 /etc/placement/placement.conf # chown root:placement /etc/placement/placement.conf
1
2
3
# su -s /bin/sh -c "placement-manage db sync" placement # systemctl restart apache2 # cat /etc/apache2/sites-enabled/placement-api.conf
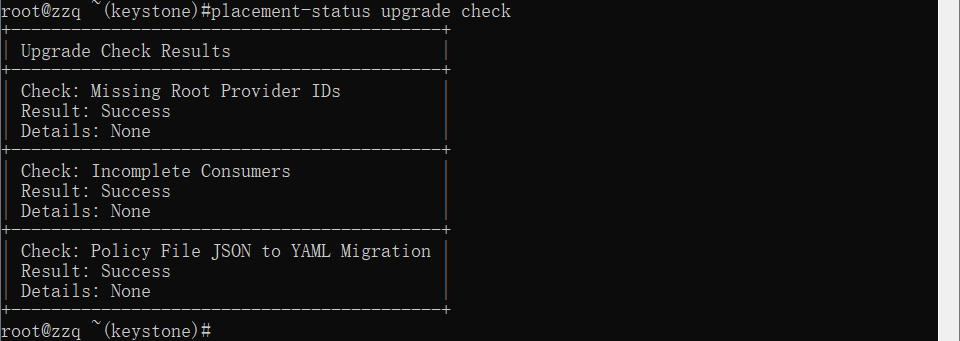
进行验证
1 # placement-status upgrade check
验证完毕。
创建nova database
1
2
3
4
5
6
7
8
9
10
11
12
13
14
15
16
17
18
19
20
# mysql -u root -p > create database nova; > create database nova_api; > create database nova_cell0; > grant all privileges on nova.* to nova@localhost identified by 'Nova!2024'; > grant all privileges on nova.* to nova@'%' identified by 'Nova!2024'; > grant all privileges on nova_api.* to nova@localhost identified by 'Nova!2024'; > grant all privileges on nova_api.* to nova@'%' identified by 'Nova!2024'; > grant all privileges on nova_cell0.* to nova@localhost identified by 'Nova!2024'; > grant all privileges on nova_cell0.* to nova@'%' identified by 'Nova!2024'; > flush privileges; > exit # openstack user create --domain default --project service --password 'Nova!2024' nova # openstack role add --project service --user nova admin # openstack service create --name nova --description "OpenStack Compute" compute # controller=192.168.56.103 # openstack endpoint create --region RegionOne compute public http://$controller:8774/v2.1/%\(tenant_id\)s # openstack endpoint create --region RegionOne compute internal http://$controller:8774/v2.1/%\(tenant_id\)s # openstack endpoint create --region RegionOne compute admin http://$controller:8774/v2.1/%\(tenant_id\)s # openstack endpoint list
1
2
3
4
5
6
7
8
9
10
11
12
13
14
15
16
17
18
19
20
21
22
23
24
25
26
27
28
29
30
31
32
33
34
35
36
37
38
39
40
41
42
43
44
45
# apt -y install nova-api nova-conductor nova-scheduler nova-novncproxy python3-novaclient create a new config file # mv /etc/nova/nova.conf /etc/nova/nova.conf.org # vi /etc/nova/nova.conf [DEFAULT] my_ip = 192.168.56.103 state_path = /var/lib/nova enabled_apis = osapi_compute,metadata log_dir = /var/log/nova transport_url = rabbit://openstack:Openstack!2024@192.168.56.103 [api] auth_strategy = keystone [api_database] connection = mysql+pymysql://nova:Nova!2024@192.168.56.103/nova_api [database] connection = mysql+pymysql://nova:Nova!2024@192.168.56.103/nova [glance] api_servers = http://192.168.56.103:9292 [keystone_authtoken] www_authenticate_uri = http://192.168.56.103:5000 auth_url = http://192.168.56.103:5000 memcached_servers = 192.168.56.103:11211 auth_type = password project_domain_name = default user_domain_name = default project_name = service username = nova password = Nova!2024 [oslo_concurrency] lock_path = $state_path/tmp [placement] auth_url = http://192.168.56.103:5000 os_region_name = RegionOne auth_type = password project_domain_name = default user_domain_name = default project_name = service username = placement password = Placement!2024 [scheduler] discover_hosts_in_cells_interval = 300 [wsgi] api_paste_config = /etc/nova/api-paste.ini # chmod 640 /etc/nova/nova.conf # chown root.nova /etc/nova/nova.conf
1
2
3
4
5
6
7
# su -s /bin/sh -c "nova-manage api_db sync" nova # su -s /bin/sh -c "nova-manage cell_v2 map_cell0" nova # su -s /bin/sh -c "nova-manage cell_v2 create_cell --name=cell1 --verbose" nova # su -s /bin/sh -c "nova-manage db sync" nova # su -s /bin/sh -c "nova-manage cell_v2 list_cells" nova # systemctl restart nova-api nova-conductor nova-scheduler nova-novncproxy # systemctl enable nova-api nova-conductor nova-scheduler nova-novncproxy
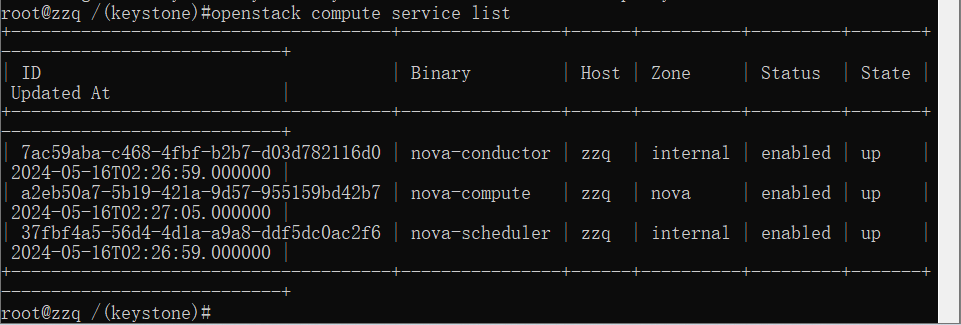
进行验证
1 # openstack compute service list
安装KVM HyperVisor
1
2
3
4
5
# apt -y install qemu-kvm libvirt-daemon-system libvirt-daemon virtinst bridge-utils libosinfo-bin libguestfs-tools virt-top # systemctl start libvirtd # systemctl enable libvirtd # virsh version # apt -y install nova-compute nova-compute-kvm
配置nova.conf文件
1
2
3
4
5
6
7
8
9
10
11
12
13
14
15
16
17
18
19
20
21
22
23
24
25
26
27
28
29
30
31
32
33
34
35
36
37
38
39
40
41
42
43
44
45
46
vi /etc/nova/nova.conf [DEFAULT] my_ip = 192.168.56.103 state_path = /var/lib/nova enabled_apis = osapi_compute,metadata log_dir = /var/log/nova transport_url = rabbit://openstack:Openstack!2024@192.168.56.103 [api] auth_strategy = keystone [glance] api_servers = http://192.168.56.103:9292 [keystone_authtoken] www_authenticate_uri = http://192.168.56.103:5000 auth_url = http://192.168.56.103:5000 memcached_servers = 192.168.56.103:11211 auth_type = password project_domain_name = default user_domain_name = default project_name = service username = nova password = Nova!2024 [oslo_concurrency] lock_path = $state_path/tmp [placement] auth_url = http://192.168.56.103:5000 os_region_name = RegionOne auth_type = password project_domain_name = default user_domain_name = default project_name = service username = placement password = Placement!2024 [scheduler] discover_hosts_in_cells_interval = 300 [wsgi] api_paste_config = /etc/nova/api-paste.ini [vnc] enabled = True server_listen = 0.0.0.0 server_proxyclient_address = $my_ip novncproxy_base_url = http://192.168.56.103:6080/vnc_auto.html # systemctl restart nova-compute # systemctl enable nova-compute # su -s /bin/sh -c "nova-manage cell_v2 discover_hosts --verbose" nova # openstack compute service list # openstack hypervisor list
创建neutron database
1
2
3
4
5
6
7
8
9
10
11
12
13
14
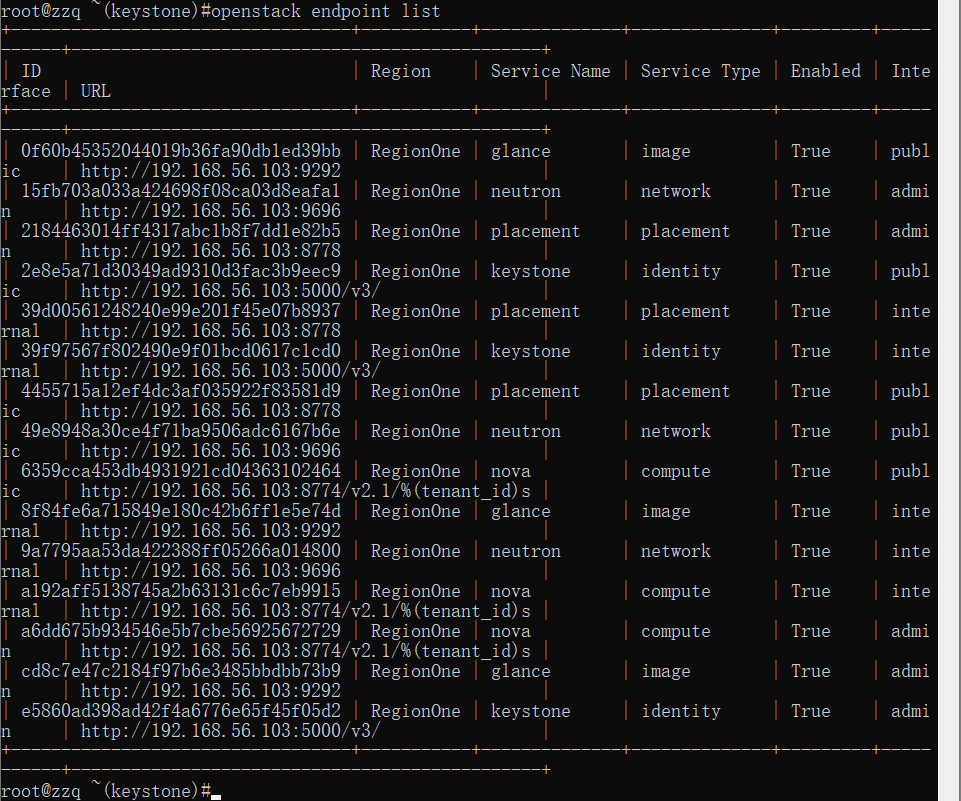
# mysql -u root –p > create database neutron; > grant all privileges on neutron.* to neutron@localhost identified by 'Neutron!2024'; > grant all privileges on neutron.* to neutron@'%' identified by 'Neutron!2024'; > flush privileges; > exit # openstack user create --domain default --project service --password 'Neutron!2024' neutron # openstack role add --project service --user neutron admin # openstack service create --name neutron --description "OpenStack Networking service" network # export network=192.168.56.103 # openstack endpoint create --region RegionOne network public http://$network:9696 # openstack endpoint create --region RegionOne network internal http://$network:9696 # openstack endpoint create --region RegionOne network admin http://$network:9696 # openstack endpoint list
1
2
3
4
5
6
7
8
9
10
11
12
13
14
15
16
17
# apt -y install neutron-server neutron-metadata-agent neutron-plugin-ml2 neutron-dhcp-agent neutron-l3-agent python3-neutronclient neutron-openvswitch-agent # apt -y install neutron-common neutron-plugin-ml2 neutron-openvswitch-agent # ip addr # vi /etc/netplan/00-installer-config.yaml network: network: ethernets: enp0s3: dhcp4: true enp0s8: dhcp4: true enp0s9: dhcp4: false version: 2 # netplan apply # ovs-vsctl show # ovs-vsctl add-br br-eth # ovs-vsctl add-port br-eth enp0s9
Controller Node config file:
1
2
3
4
5
6
7
8
# cd /etc/neutron/ # mv neutron.conf neutron.conf.org # mv metadata_agent.ini metadata_agent.ini.org # mv l3_agent.ini l3_agent.ini.org # mv dhcp_agent.ini dhcp_agent.ini.org # cd /etc/neutron/plugins/ml2/ # mv ml2_conf.ini ml2_conf.ini.org # mv openvswitch_agent.ini openvswitch_agent.ini.org
1
2
3
4
5
6
7
8
9
10
11
12
13
14
15
16
17
18
19
20
21
22
23
24
25
26
27
28
29
30
31
32
33
34
35
36
37
38
39
40
41
42
43
44
45
46
47
48
49
50
51
52
53
54
55
56
57
58
59
60
61
62
63
64
65
66
67
68
69
# vi /etc/neutron/neutron.conf [DEFAULT] core_plugin = ml2 service_plugins = router auth_strategy = keystone state_path = /var/lib/neutron dhcp_agent_notification = True allow_overlapping_ips = True notify_nova_on_port_status_changes = True notify_nova_on_port_data_changes = True transport_url = rabbit://openstack:Openstack!2024@192.168.56.103 [database] connection = mysql+pymysql://neutron:Neutron!2024@192.168.56.103/neutron [agent] root_helper = sudo /usr/bin/neutron-rootwrap /etc/neutron/rootwrap.conf [keystone_authtoken] www_authenticate_uri = http://192.168.56.103:5000 auth_url = http://192.168.56.103:5000 memcached_servers = 192.168.56.103:11211 auth_type = password project_domain_name = default user_domain_name = default project_name = service username = neutron password = Neutron!2024 [nova] auth_url = http://192.168.56.103:5000 auth_type = password project_domain_name = default user_domain_name = default region_name = RegionOne project_name = service username = nova password = Nova!2024 [oslo_concurrency] lock_path = $state_path/tmp # vi /etc/neutron/l3_agent.ini [DEFAULT] interface_driver = openvswitch # vi /etc/neutron/dhcp_agent.ini [DEFAULT] interface_driver = openvswitch dhcp_driver = neutron.agent.linux.dhcp.Dnsmasq enable_isolated_metadata = true # vi /etc/neutron/metadata_agent.ini [DEFAULT] nova_metadata_host = 192.168.56.103 metadata_proxy_shared_secret = metadata_secret [cache] memcache_servers = 192.168.56.103:11211 # vi /etc/neutron/plugins/ml2/ml2_conf.ini [DEFAULT] [ml2] type_drivers = flat,vlan,gre,vxlan tenant_network_types = mechanism_drivers = openvswitch extension_drivers = port_security [ml2_type_flat] flat_networks = physnet1 [ml2_type_vlan] network_vlan_ranges = physnet1:1:1000 # vi /etc/neutron/plugins/ml2/openvswitch_agent.ini [DEFAULT] [ovs] bridge_mappings = physnet1:br-eth [securitygroup] firewall_driver = openvswitch enable_security_group = true enable_ipset = true
1
2
3
4
5
6
7
8
9
10
11
12
13
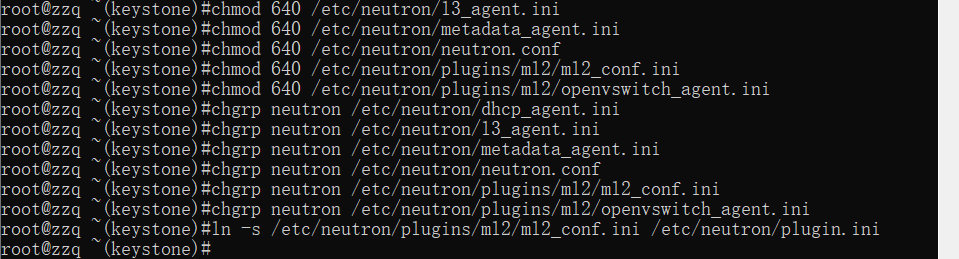
chmod 640 /etc/neutron/dhcp_agent.ini chmod 640 /etc/neutron/l3_agent.ini chmod 640 /etc/neutron/metadata_agent.ini chmod 640 /etc/neutron/neutron.conf chmod 640 /etc/neutron/plugins/ml2/ml2_conf.ini chmod 640 /etc/neutron/plugins/ml2/openvswitch_agent.ini chgrp neutron /etc/neutron/dhcp_agent.ini chgrp neutron /etc/neutron/l3_agent.ini chgrp neutron /etc/neutron/metadata_agent.ini chgrp neutron /etc/neutron/neutron.conf chgrp neutron /etc/neutron/plugins/ml2/ml2_conf.ini chgrp neutron /etc/neutron/plugins/ml2/openvswitch_agent.ini ln -s /etc/neutron/plugins/ml2/ml2_conf.ini /etc/neutron/plugin.ini
1
2
3
4
5
6
7
8
9
10
11
12
13
14
15
16
17
18
19
20
21
22
23
24
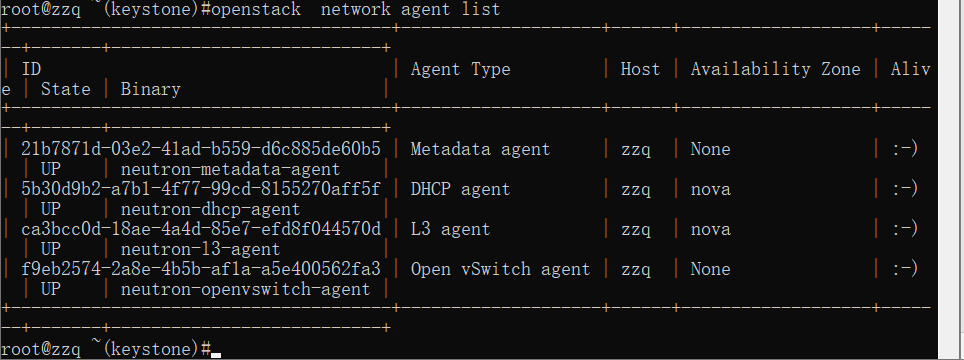
# vi /etc/nova/nova.conf [DEFAULT] use_neutron = True linuxnet_interface_driver = nova.network.linux_net.LinuxOVSInterfaceDriver firewall_driver = nova.virt.firewall.NoopFirewallDriver vif_plugging_is_fatal = True vif_plugging_timeout = 300 [neutron] auth_url = http://192.168.100.100:5000 auth_type = password project_domain_name = default user_domain_name = default region_name = RegionOne project_name = service username = neutron password = Neutron!2024 service_metadata_proxy = True metadata_proxy_shared_secret = metadata_secret # su -s /bin/bash neutron -c "neutron-db-manage --config-file /etc/neutron/neutron.conf --config-file /etc/neutron/plugin.ini upgrade head" # systemctl restart neutron-server neutron-metadata-agent neutron-dhcp-agent neutron-openvswitch-agent # systemctl enable neutron-server neutron-metadata-agent neutron-dhcp-agent neutron-openvswitch-agent # systemctl restart nova-api # systemctl disable neutron-l3-agent && systemctl stop neutron-l3agent # openstack network agent list
因为本实验所有内容在一台虚拟机上完成,前面配置的是控制节点的neutron服务,计算节点的neutron服务配置文件内容比控制节点的配置更简化,这里不再重新配置。因为该虚拟机既是控制节点也是计算节点,从上图中可以看到计算节点的服务也成功启动了。下面配置一下子网。
1
2
3
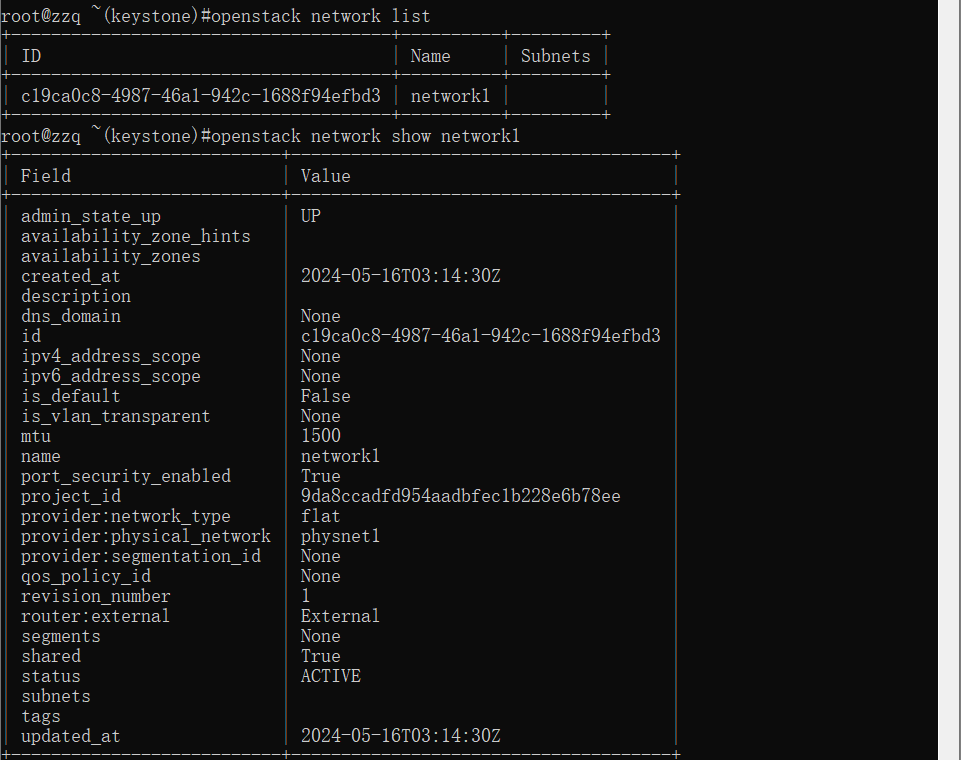
# openstack network create --project service --share --external --provider-network-type flat --provider-physical-network physnet1 network1 # openstack network list # openstack network show network1
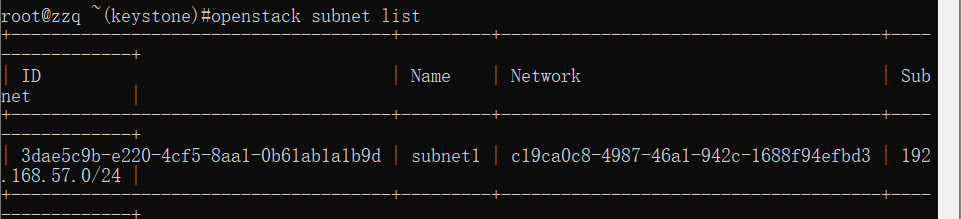
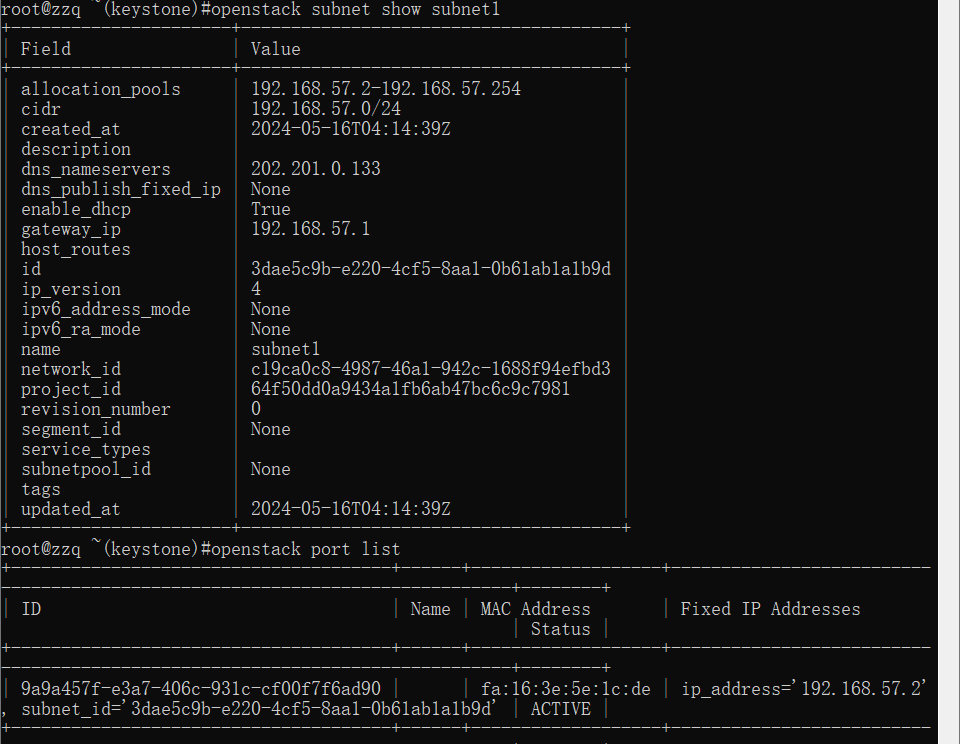
创建子网,Provider网络由外部网络决定。创建了名为subnent1的子网,网络地址段为192.168.57.0/24。
1
2
3
4
# openstack subnet create subnet1 --network network1 --subnet-range 192.168.57.0/24 --allocation-pool start=192.168.57.2,end=192.168.57.254 --gateway 192.168.57.1 --dns-nameserver 202.201.0.133 # openstack subnet list # openstack subnet show subnet1 # openstack port list
1
2
3
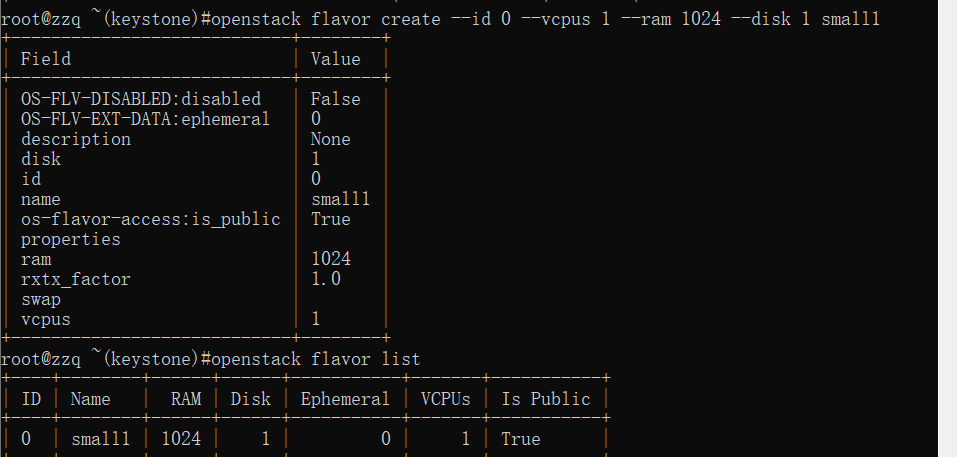
# openstack image list # openstack flavor create --id 0 --vcpus 1 --ram 1024 --disk 1 small1 # openstack flavor list
1
2
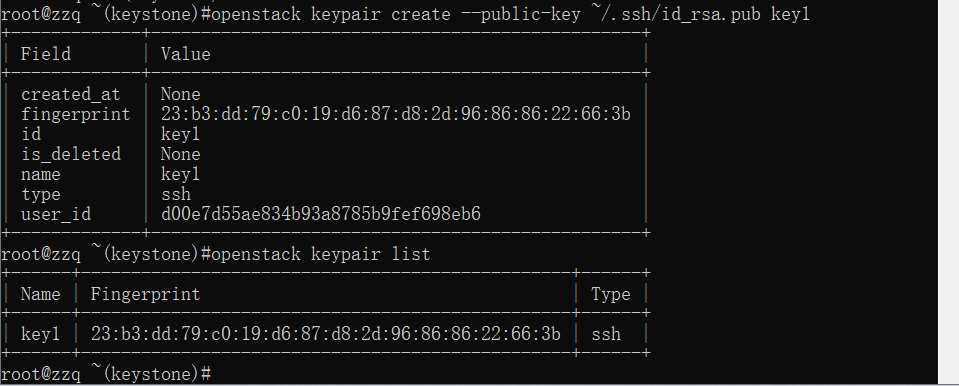
# openstack keypair create --public-key ~/.ssh/id_rsa.pub key1 # openstack keypair list
1
2
3
4
5
6
7
8
9
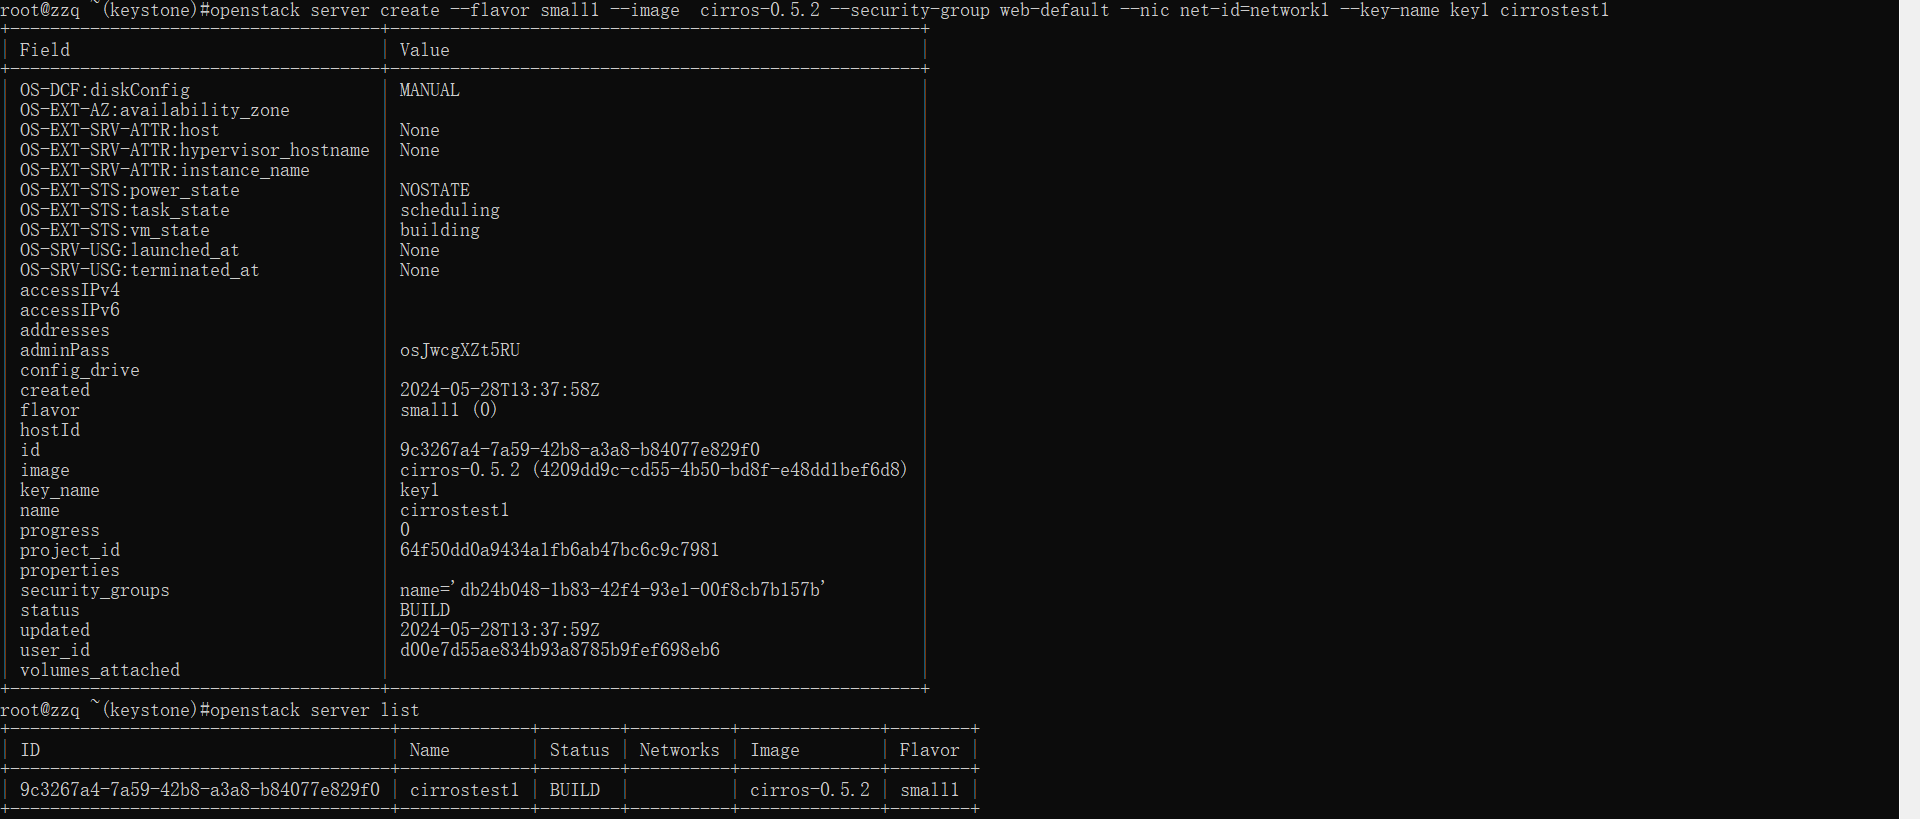
# openstack security group list # openstack security group create web-default # openstack security group rule create --protocol tcp --dst-port 80:80 --ingress web-default # openstack security group rule create --protocol tcp --dst-port 443:443 --ingress web-default # openstack security group rule create --protocol tcp --dst-port 22:22 --ingress web-default # openstack security group rule create --protocol icmp --icmp-type 8 --icmp-code 0 --ingress web-default # openstack server create --flavor small1 --image cirros-0.5.2 \ --security-group web-default --nic net-id=network1 --key-name key1 cirrostest1 # openstack server list
创建成功。
1
2
3
4
5
6
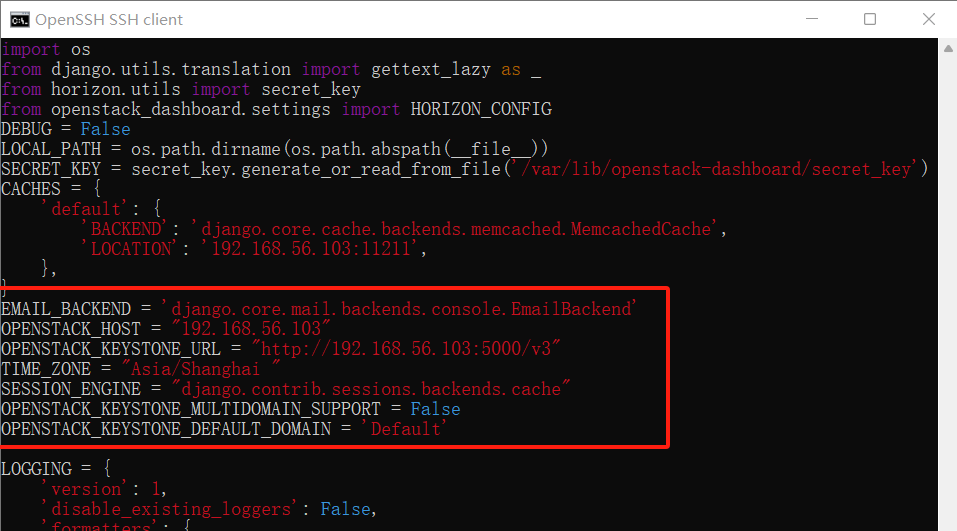
# apt -y install openstack-dashboard # mv /etc/openstack-dashboard/local_settings.py /etc/openstack-dashboard/local_settings.py.org # grep -Ev '^$|#' /etc/openstack-dashboard/local_settings.py.org > /etc/openstack-dashboard/local_settings.py # chown root:horizon /etc/openstack-dashboard/local_settings.py # chmod 640 /etc/openstack-dashboard/local_settings.py # vi /etc/openstack-dashboard/local_settings.py
1 # systemctl restart apache2
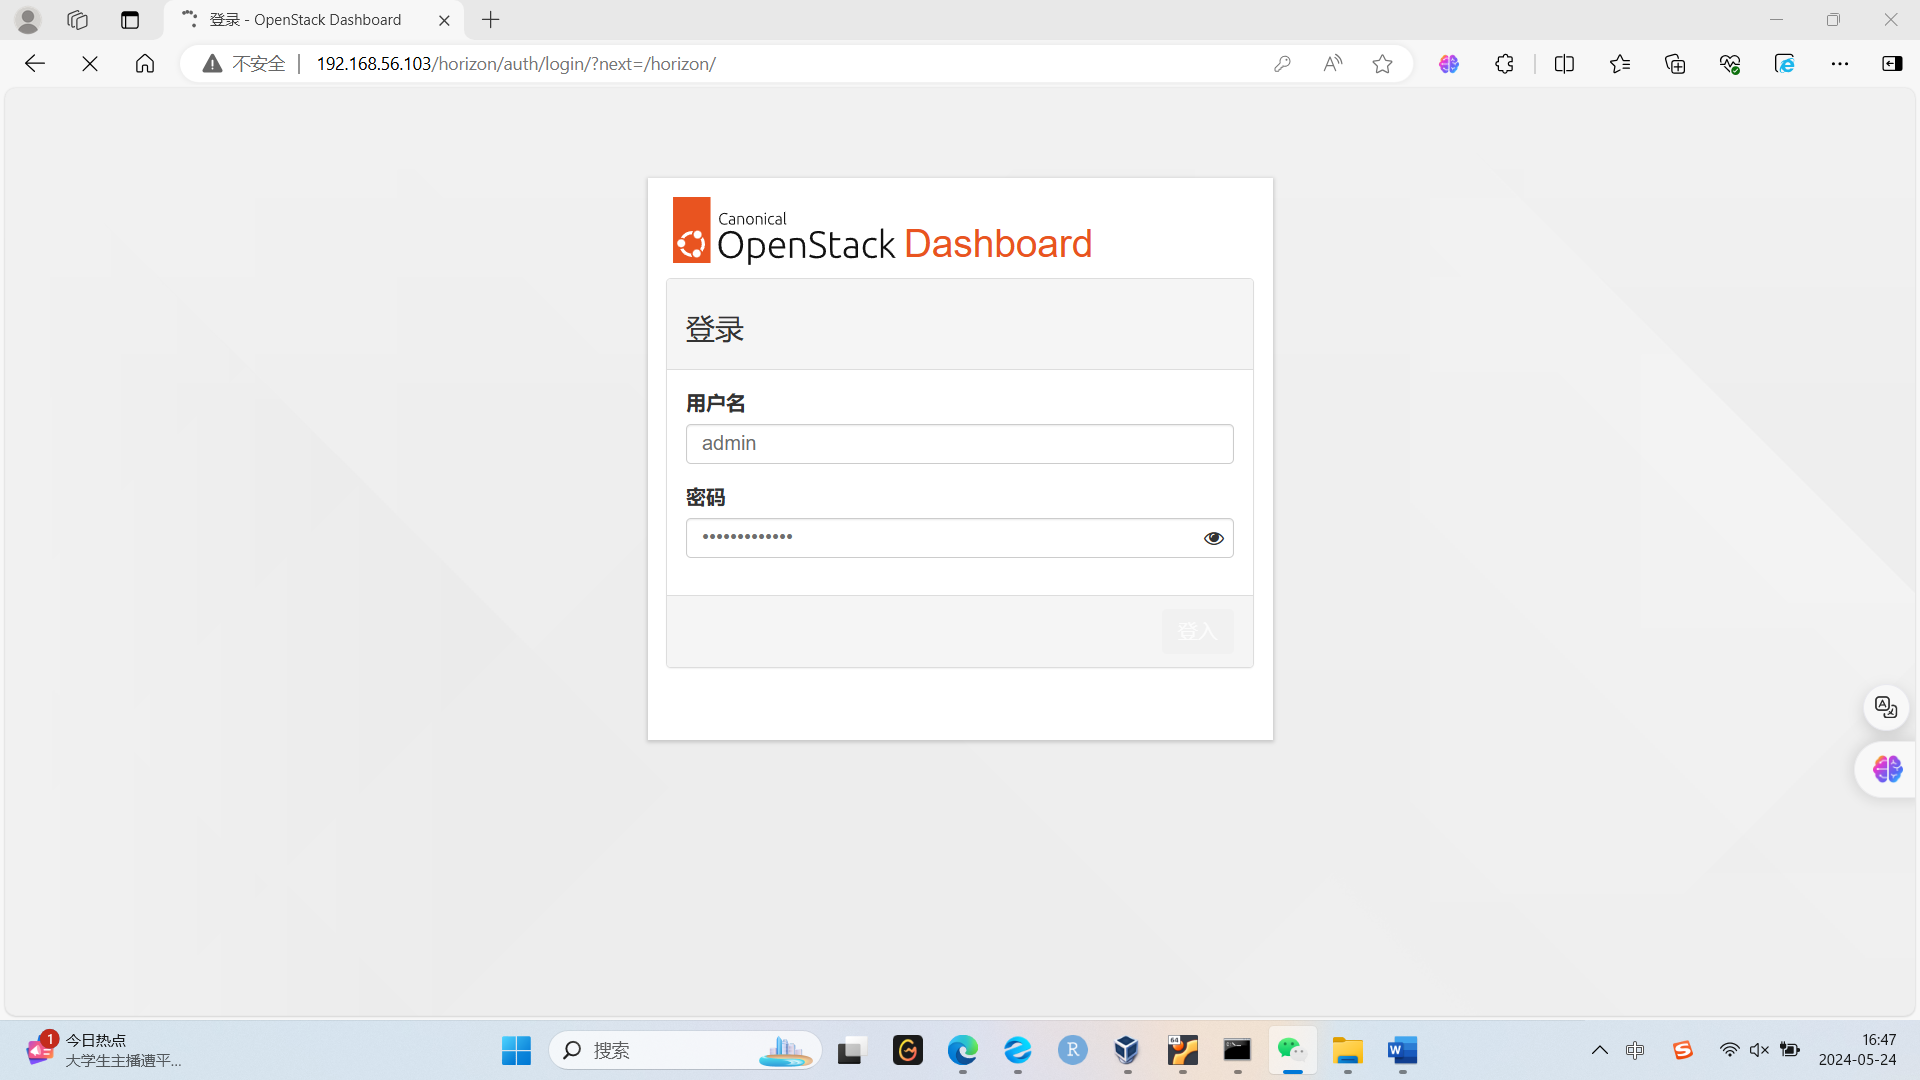
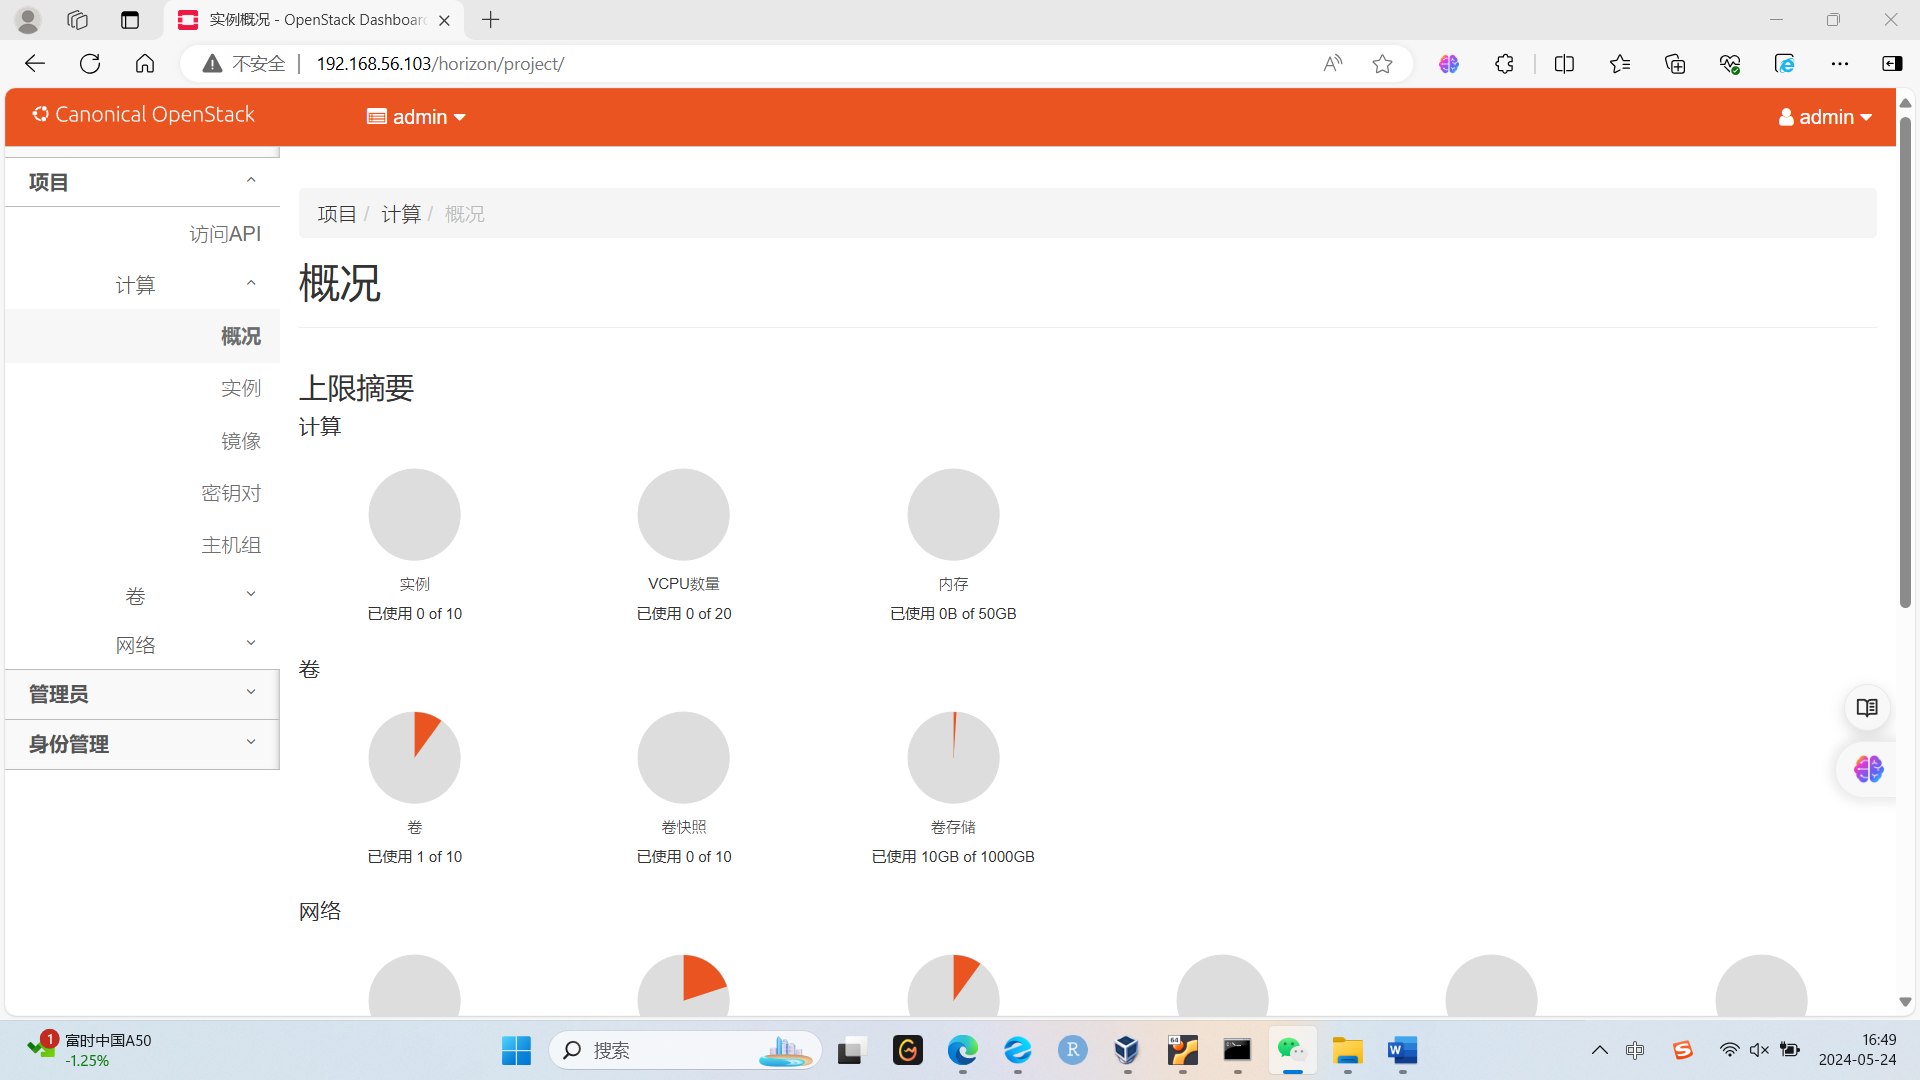
然后我们访问http://192.168.56.103/horizon
账户为admin,密码为Keystone!2024
创建cinder database:
1
2
3
4
5
6
7
8
9
10
11
12
13
14
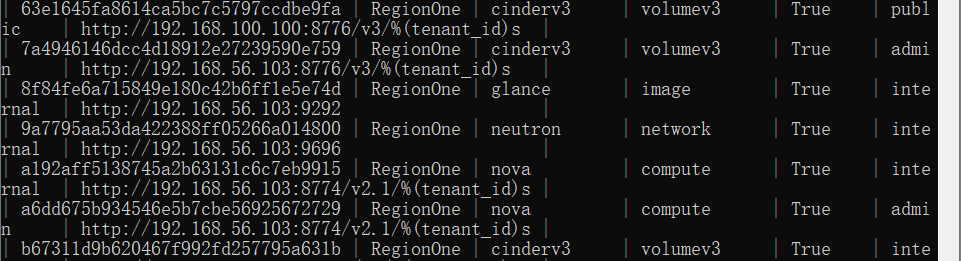
# mysql -u root -p > create database cinder; > grant all privileges on cinder.* to cinder@localhost identified by 'Cinder!2024'; > grant all privileges on cinder.* to cinder@'%' identified by 'Cinder!2024'; > flush privileges; > exit # openstack user create --domain default --project service --password 'Cinder!2024' cinder # openstack role add --project service --user cinder admin # openstack service create --name cinderv3 --description "OpenStack Block Storage" volumev3 # export controller=192.168.100.100 # openstack endpoint create --region RegionOne volumev3 public http://$controller:8776/v3/%\(tenant_id\)s # openstack endpoint create --region RegionOne volumev3 internal http://$controller:8776/v3/%\(tenant_id\)s # openstack endpoint create --region RegionOne volumev3 admin http://$controller:8776/v3/%\(tenant_id\)s # openstack endpoint list
安装cinder-api cinder-scheduler at controller node
1
2
3
4
5
6
7
8
9
10
11
12
13
14
15
16
17
18
19
20
21
22
23
24
25
26
27
# apt -y install cinder-api cinder-scheduler python3-cinderclient # mv /etc/cinder/cinder.conf /etc/cinder/cinder.conf.org # vi /etc/cinder/cinder.conf # chmod 640 /etc/cinder/cinder.conf # chgrp cinder /etc/cinder/cinder.conf [DEFAULT] my_ip = 192.168.56.103 rootwrap_config = /etc/cinder/rootwrap.conf api_paste_confg = /etc/cinder/api-paste.ini state_path = /var/lib/cinder auth_strategy = keystone transport_url = rabbit://openstack:Openstack!2024@192.168.56.103 enable_v3_api = True [database] connection = mysql+pymysql://cinder:Cinder!2024@192.168.56.103/cinder [keystone_authtoken] www_authenticate_uri = http://192.168.56.103:5000 auth_url = http://192.168.56.103:5000 memcached_servers = 192.168.56.103:11211 auth_type = password project_domain_name = default user_domain_name = default project_name = service username = cinder password = Cinder!2024 [oslo_concurrency] lock_path = $state_path/tmp
1
2
3
4
5
# su -s /bin/bash cinder -c "cinder-manage db sync" # systemctl restart cinder-scheduler # echo "export OS_VOLUME_API_VERSION=3" >> ~/keystonerc # source ~/keystonerc # openstack volume service list
1
2
3
4
5
6
7
8
9
10
11
12
13
14
15
16
17
18
19
20
21
22
23
24
25
26
27
28
29
30
31
32
33
34
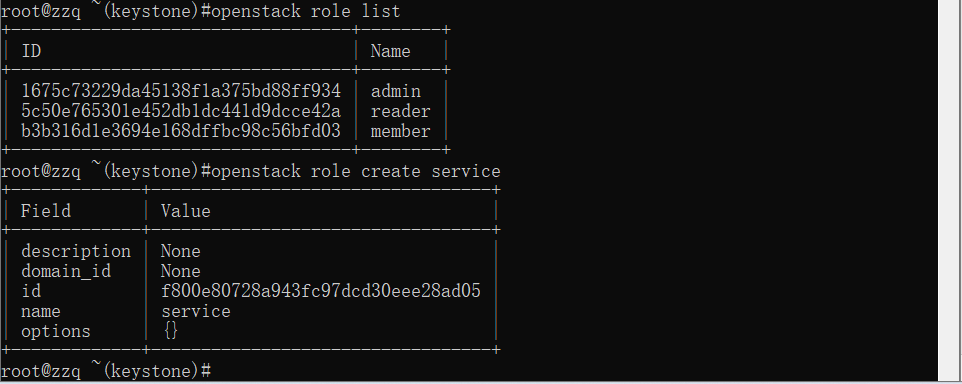
# apt -y install cinder-volume python3-mysqldb # mv /etc/cinder/cinder.conf /etc/cinder/cinder.conf.org # vi /etc/cinder/cinder.conf # chown root.cinder /etc/cinder/cinder.conf # chmod 640 /etc/cinder/cinder.conf # systemctl enable cinder-volume [DEFAULT] my_ip = 192.168.56.103 rootwrap_config = /etc/cinder/rootwrap.conf api_paste_confg = /etc/cinder/api-paste.ini state_path = /var/lib/cinder auth_strategy = keystone transport_url = rabbit://openstack:Openstack!2024@192.168.56.103 enable_v3_api = True glance_api_servers = http://192.168.56.103:9292 enabled_backends = [database] connection = mysql+pymysql://cinder:Cinder!2024@192.168.56.103/cinder [keystone_authtoken] www_authenticate_uri = http://192.168.56.103:5000 auth_url = http://192.168.56.103:5000 memcached_servers = 192.168.56.103:11211 auth_type = password project_domain_name = default user_domain_name = default project_name = service username = cinder password = Cinder!2024 [oslo_concurrency] lock_path = $state_path/tmp [oslo_policy] enforce_new_defaults = true # openstack role list # openstack role create service
1
2
# openstack role add --user cinder --project service service # openstack role add --user nova --project service service
#vi /etc/cinder/cinder.conf
1
2
3
4
5
6
7
8
9
10
11
12
13
14
15
16
17
18
19
20
21
22
23
24
25
[service_user] send_service_user_token = True auth_url = http://192.168.56.103:5000 project_domain_name = Default project_name = service user_domain_name = Default auth_type = password username = cinder password = Cinder!2024 # vi /etc/nova/nova.conf [keystone_authtoken] service_token_roles = service service_token_roles_required = true [service_user] send_service_user_token = True auth_url = http://192.168.56.103:5000 project_domain_name = Default project_name = service user_domain_name = Default auth_type = password username = cinder password = Cinder!2024 [cinder] region_name = RegionOne # systemctl restart nova-compute
1
2
3
4
5
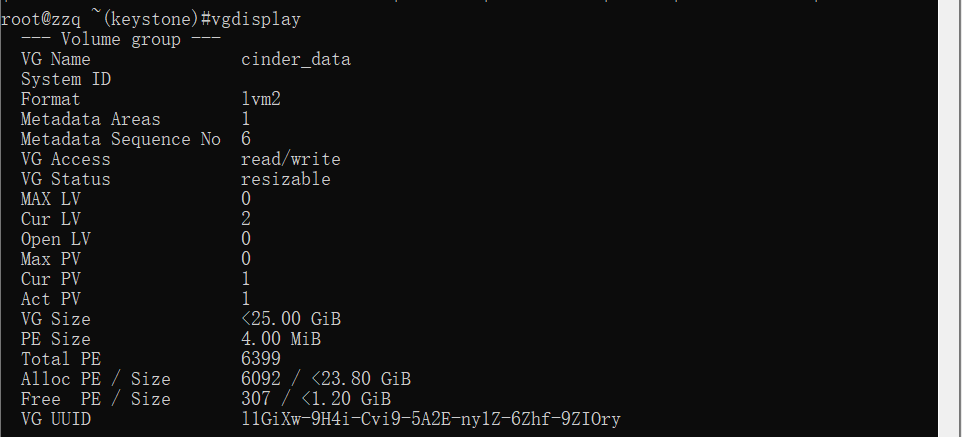
# systemctl enable cinder-volume # apt -y install open-iscsi # lsblk # pvcreate /dev/sdb # vgcreate cinder_data /dev/sdb
增加volume服务相关配置
1
2
3
4
5
6
7
8
9
10
11
12
# vi /etc/cinder/cinder.conf [DEFAULT] enabled_backends = lvm [lvm] target_helper = lioadm target_protocol = iscsi # IP address of Storage Node target_ip_address = 192.168.56.103 # volume group name just created volume_group = cinder_data volume_driver = cinder.volume.drivers.lvm.LVMVolumeDriver volumes_dir = $state_path/volumes
启动服务
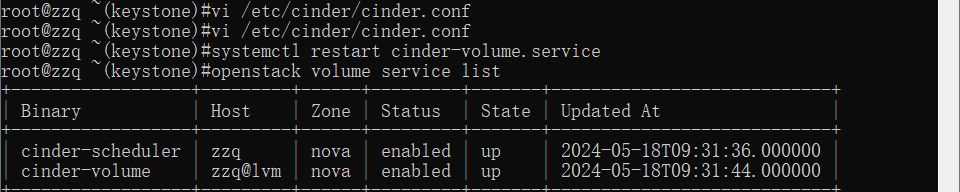
1
2
# systemctl restart cinder-volume.service # openstack volume service list
1
2
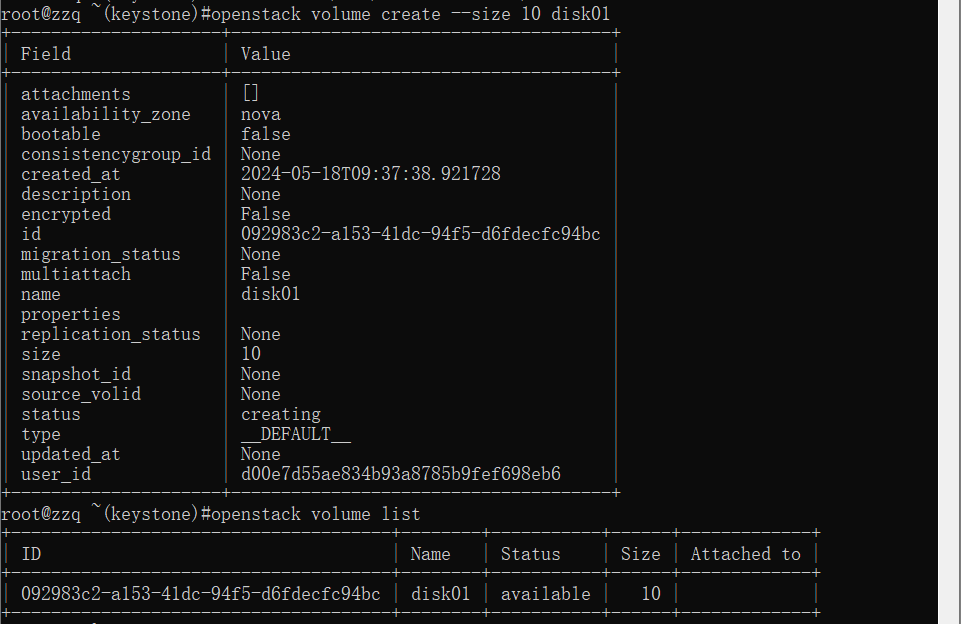
# openstack volume create --size 10 disk01 # openstack volume list
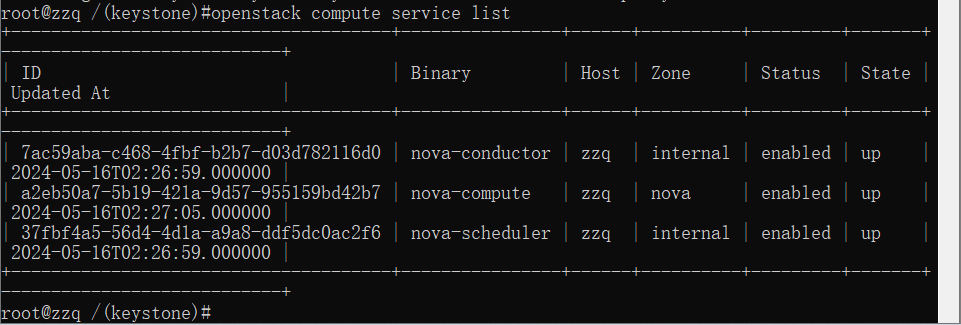
计算节点配置安装过程与控制节点基本一致,这里不再展示,因为我使用的是一台主机完成全部实验。
1 openstack compute service list
冷迁移只需做计算节点间nova用户ssh免密认证即可,因为我们这里是伪集群,因此我们需要做一些调整
1 2 3 4 5 6 7 8 9 # usermod -s /bin/bash nova # su - nova $ ssh-keygen -t rsa -P '' -f ~/.ssh/id_rsa $ cat ~/.ssh/id_rsa.pub >> ~/.ssh/authorized_keys $ chmod 600 ~/.ssh/authorized_keys $ vi ~/.ssh/config Host * StrictHostKeyChecking no $ chmod 600 ~/.ssh/config
其他计算节点从完成ssh免密认证的节点远程拷贝配置,并修改文件属主和属组
1
2
3
# ssh node03 # scp -r node02:/var/lib/nova/.ssh /var/lib/nova/ # chown -R nova.nova /var/lib/nova/.ssh/
给所有节点nova.conf配置文件[DEFAULT]下添加冷迁移配置并重启服务
1
2
3
4
5
# vi /etc/nova/nova.conf [DEFAULT] resume_guests_state_on_host_boot = true allow_resize_to_same_host=True enabled_filters = AvailabilityZoneFilter,ComputeFilter,ComputeCapabilitiesFilter,ImagePropertiesFilter,ServerGroupAntiAffinityFilter,ServerGroupAffinityFilter
控制节点重启服务
1 # systemctl restart nova-api nova-conductor nova-scheduler nova-novncproxy
计算节点重启服务
1 # systemctl restart nova-compute
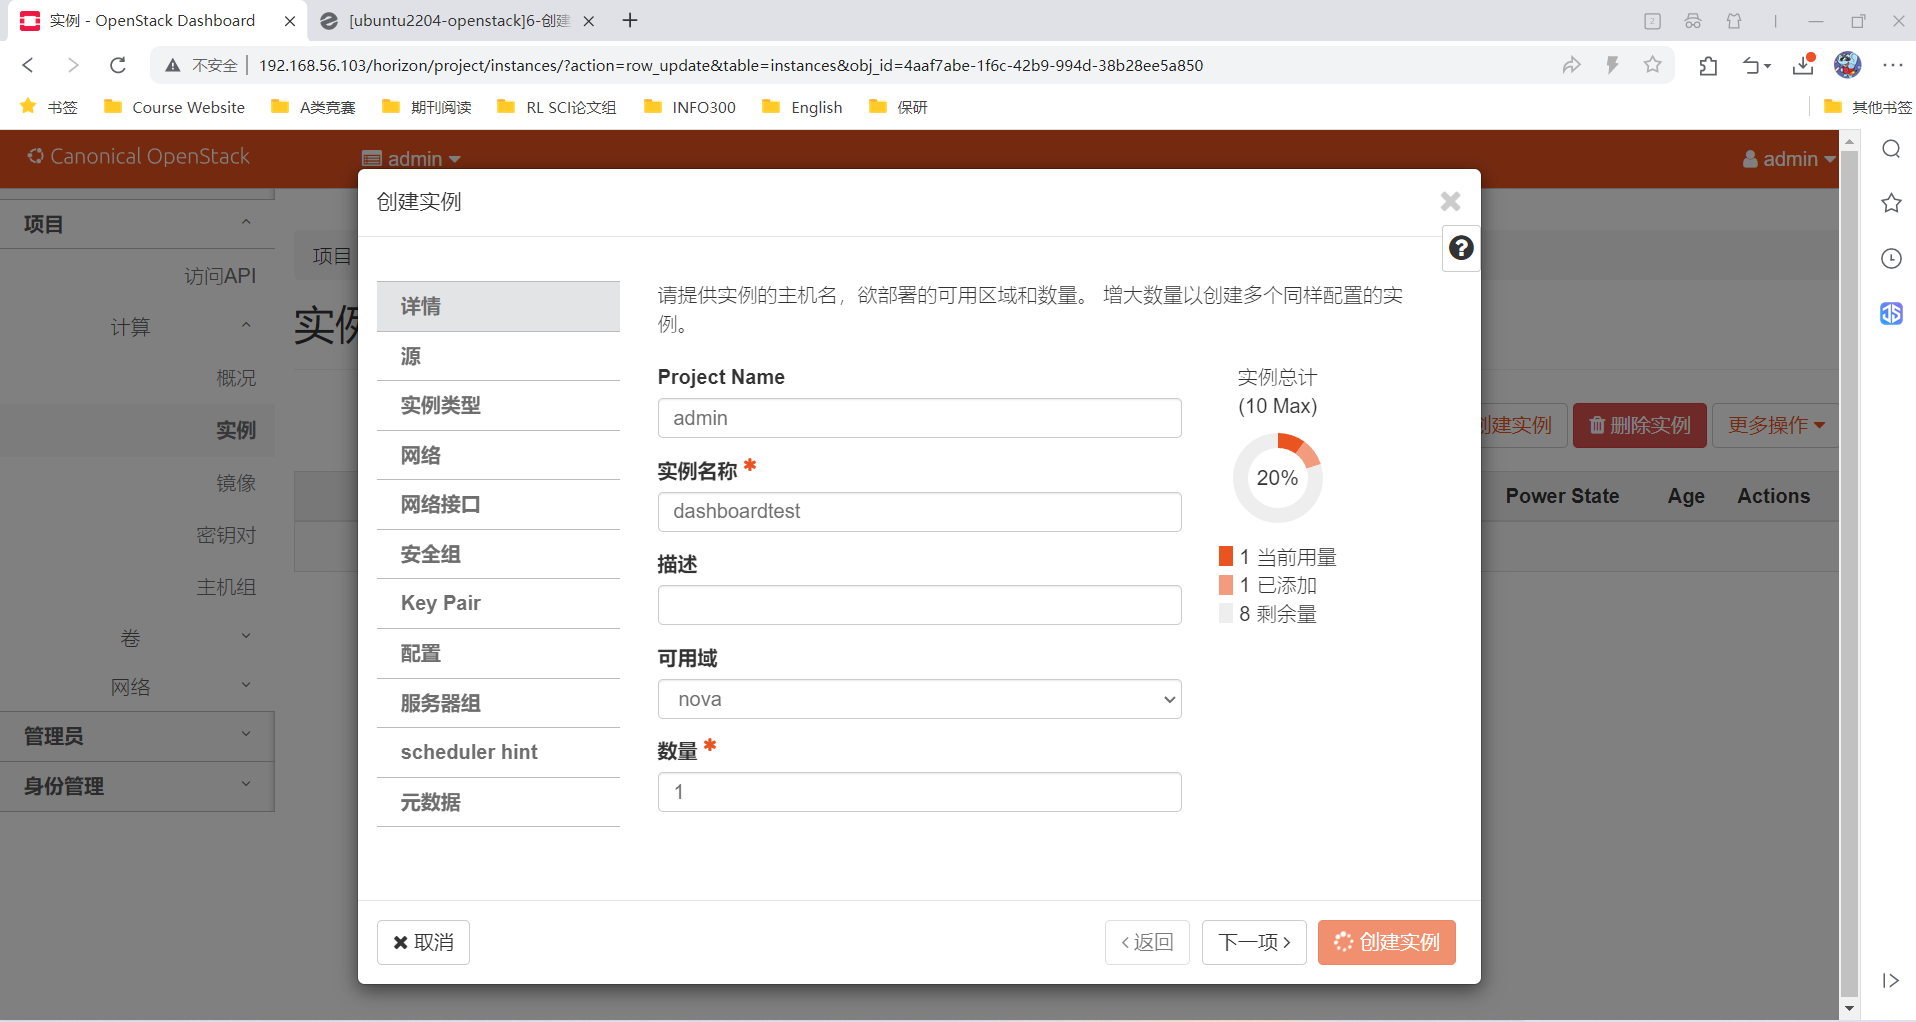
到这里,实例创建、Cinder 卷服务和冷迁移流程都已经跑通。由于当前环境是单机伪集群,没有继续展开热迁移。
这次 OpenStack 搭建主要有三点收获:
(1)环境准备和基础配置很关键,包括网络、主机名、时区、SSH 和系统参数优化。OpenStack 组件很多,前期基础环境不稳定,后面排错成本会很高。
(2)Keystone、Glance、Placement、Nova、Neutron、Cinder 之间的依赖关系需要逐层验证。每完成一个服务,都要通过 endpoint、service list 或资源创建命令确认状态。
(3)OpenStack 的复杂度不在单个命令,而在配置一致性。数据库连接、RabbitMQ 地址、Keystone 认证、服务用户、endpoint 和 systemd 服务状态需要全部对齐。
后续如果继续扩展,可以把控制节点和计算节点拆开,再补充多节点调度、热迁移和更完整的存储后端。